


Chatbot with RAG + Memory - Cohere AI, Streamlit, Langchain, Qdrant
My findings on making a chatbot with RAG functionalities, with open source model + langchain and deploying it with custom css


To be honest, I'm not the type of person who blogs every week, but when I decided to dive into the world of chatbots with Langchain, I encountered some interesting challenges. Most of the content out there seemed to revolve around OpenAI (GPT ) and Langchain, but there was a noticeable lack of information on open-source LLMs like Cohere and open-source vector databases like Qdrant. This made my initial attempts at building a chatbot with Cohere, Langchain, and Qdrant quite challenging. It felt like there were tons of resources for OpenAI, but only a handful for CohereAI
So this blog contains my findings and a walkthrough of how I made my chatbot.
Setting up the environment and variables
In order to start, first we need to install dependencies and set up our environment.
Installing dependencies
- Initialize your virtualenv (your choice)
Install all the necessary dependencies
pip install -r requirements.txt
After installing requirements create:
create a
.streamlitfolder and addsecrets.toml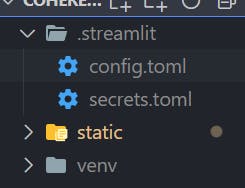
Getting API key for cohere.AI
After completing the installs, its time to set up the api-key.
Visit cohere.AI and create your account.
Then head to the dashboard to create your free trial API key.
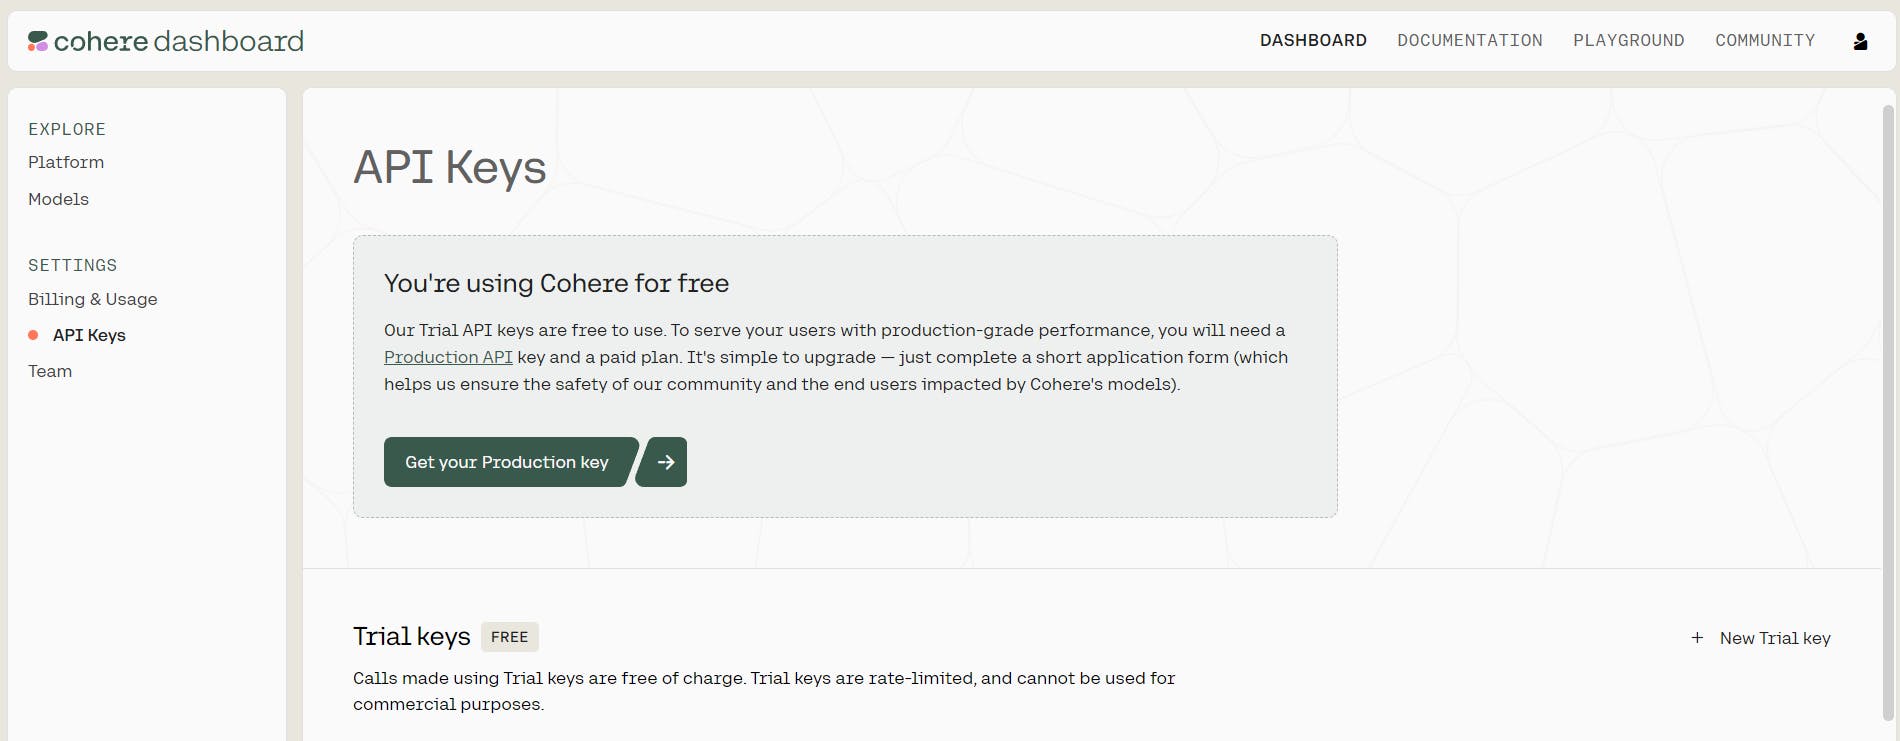
Add your API key to
secrets.tomlfile
Qdrant cloud API key and host URL
Go to Qdrant cloud and set up your account
Give a name to your cluster
Create a Free Tier cluster with 1 node and a default configuration (1GB RAM, 0.5 CPU and 4GB Disk). This option is perfect for prototyping and you don’t need a credit card to join.
Get the API key and the host URL
Add them into
secrets.tomlfile
Setting a config file for streamlit
we need to enable static serving in streamlit
For that create a
config.tomlfile in.streamlitfolder
add these
        [server]
        enableStaticServing = true
Setting up our python file(main.py)
This is my main file for execution. Add the following code, which is self-explanatory
import os
import streamlit as st

os.environ["COHERE_API_KEY"] = st.secrets["COHERE_API_KEY"]
QDRANT_HOST = st.secrets["QDRANT_HOST"]
QDRANT_API_KEY = st.secrets["QDRANT_API_KEY"]

# Streamlit header
st.set_page_config(page_title="Co:Chat - An LLM-powered chat bot")
st.title("ElsaBot")
st.write("This is a chatbot for out custom knowledge base")
Setting up our Qdrant client
I aimed to create a persistent DB, which should not update every time I chat. It should only be created at once. So the way I did it was by creating a separate Python file dbCheck.py.
This is an efficient method to create a knowledge base. We only need to execute the dbcheck.py script once during the initial setup. This approach allows us to establish a reliable and separate database in our Qdrant cloud without making changes to our original data source. Once the knowledge base is established, there's no need for repeated execution, ensuring data integrity and ease of management in our project.
Creating our new collection - Qdrant Collection
First, create a new Python file dbCheck.py
import qdrant_client

# Creating a persistant DB
client = qdrant_client.QdrantClient(
    url = QDRANT_HOST,
    api_key= QDRANT_API_KEY,
)
# create_collection
collection_name = "my_documents"
vector_config = qdrant_client.http.models.VectorParams(
    size = 4096,
    distance = qdrant_client.http.models.Distance.COSINE
)
client.recreate_collection(
    collection_name = collection_name,
    vectors_config = vector_config,
)
Findings :
I have created a variable
client, which connects to QdrantThen create a collection with any name (each collection should have a unique name)
Here I am using cosine similarity and a size of 4096(the size can vary for each model. For OpenAI it is 1536) as the configuration for creating the vectors.
refer to docs for more information.
Text Chunking and storing in DB
I will be taking data from an external link. You can add any website of your choice. This is how it works.
from langchain.text_splitter import RecursiveCharacterTextSplitter
from langchain.document_loaders import WebBaseLoader

web_links = ["https://hotels-ten.vercel.app/api/hotels"]
loader = WebBaseLoader(web_links)
document=loader.load()

text_splitter = RecursiveCharacterTextSplitter(chunk_size=500, chunk_overlap=0)
texts = text_splitter.split_documents(document)
Findings :
If the WebBaseLoader doesn't work you can use other loaders from langchain_loaders.
Everything else is the same.
To know more about Text Splitters, check here
Note that for now, I have used only a small knowledge base. You can increase it to get more accurate results.
Now we call our embeddings model. Since we are using Cohere.AI, we will use CohereEmbeddings
from langchain.embeddings.cohere import CohereEmbeddings
embeddings = CohereEmbeddings(model = "embed-english-v2.0")
once we have initialized our embeddings model, we need to emedd our data to the Qdrant cloud
from langchain.vectorstores import Qdrant

vector_store = Qdrant(
    client=client,
    collection_name = collection_name,
    embeddings=embeddings
)
vector_store.add_documents(texts)
Now we can use the retriever to retrieve the data whenever we want
Setting up our Chat functionalities
After completing the setup of our Qdrant client and successfully creating our custom knowledge base to set up RAG. We can move towards setting up our chain and chat logic using Streamlit.
Loading knowledge base from Qdrant Cloud
import qdrant_client
from langchain.embeddings.cohere import CohereEmbeddings

def load_db():
    client = qdrant_client.QdrantClient(
        url=QDRANT_HOST,
        api_key=QDRANT_API_KEY,
    )
    embeddings = CohereEmbeddings(model="embed-english-v2.0")
    vector_store = Qdrant(
        client = client,
        collection_name = "hotelDataCollection",
        embeddings = embeddings
    )
    print("connection established !")
    return vector_store
Findings :
Here if you want to embed data from multiple languages you can use a different model from embedding from cohere
You can also check this documentation.
Setting up LLM, chain and prompt template
    prompt_template = """
        You are a Hotel Receptionist at "Four Points by Sheraton" hotel.

        You will be given a context of the conversation made so far followed by a customer's question,
        give the answer to the question using the context.
        The answer should be short, straight and to the point. If you don't know the answer, reply that the answer is not available.
        Never Hallucinate

        Context: {context}

        Question: {question}
        Answer:"""

        PROMPT = PromptTemplate(
            template=prompt_template, input_variables=["context", "question"]
        )

        chain_type_kwargs = { "prompt" : PROMPT }
        llm = Cohere(model = "command", temperature=0.5)

        #build your chain for RAG
        chain = ConversationalRetrievalChain.from_llm(
            llm = llm,
            chain_type = "stuff",
            memory = ConversationSummaryMemory(llm = llm, memory_key='chat_history', input_key='question', output_key= 'answer', return_messages=True),
            retriever = vector_store.as_retriever(),
            return_source_documents=False,
            combine_docs_chain_kwargs=chain_type_kwargs,

        )
Findings :
As for the chain, I have used ConversationalRetrievalChain here. Since I want a chatbot, which can also return the response based on the context of the previous message
ConversationalChain can also be used, but don't forget to change the prompt_template.
You can add your own prompt template.
- 🤩 A big shout to my friend who made the prompt. He is also a prompt engineer. ( Anirudh )
We are using session_state in Streamlit to get a streaming chatbot-like experience.
You can customize the prompt_template
NB: Don't change this
        Context: {context}
        Question: {question}
        Answer:
Initializing session state in Streamlit
def initialize_session_state() :
    vector_store = load_db()

    if "history" not in st.session_state:
        st.session_state.history = []

    if "chain" not in st.session_state :

        #create custom prompt for your use case
        prompt_template = """
        You are a Hotel Receptionist at "Four Points by Sheraton" hotel.

        You will be given a context of the conversation made so far followed by a customer's question,
        give the answer to the question using the context. If the context is not provided then answer the question based on the knowledge base.
        The answer should be short, straight and to the point. If you don't know the answer, reply that the answer is not available.
        Never Hallucinate.

        Context: {context}

        Question: {question}
        Answer:"""

        PROMPT = PromptTemplate(
            template=prompt_template, input_variables=["context", "question"]
        )

        chain_type_kwargs = { "prompt" : PROMPT }
        llm = Cohere(model = "command", temperature=0.5)
- So we have to add the chain to session_state
st.session_state.chain = ConversationalRetrievalChain.from_llm(
    llm = llm,
    chain_type = "stuff",
    memory = ConversationSummaryMemory(llm = llm, memory_key='chat_history', input_key='question', output_key= 'answer', return_messages=True),
    retriever = vector_store.as_retriever(),
    return_source_documents=False,
    combine_docs_chain_kwargs=chain_type_kwargs,
)
Defining the chat message
As we have finished setting up langchain and memory components, we can now add our chat. For that, we have to define a class using the dataclass import
from dataclasses import dataclass
@dataclass
class Message :
    """Class for keepiong track of chat Message."""
    origin : Literal["Customer","elsa"]
    Message : "str"
Also, we can load our styles to customize our chatbot. You can edit the styles as per your liking.
def load_css():
    with open("static/styles.css", "r")  as f:
        css = f"<style>{f.read()} </style>"
        # st.write(css)
        st.markdown(css, unsafe_allow_html = True)
Defining a call-back function
This function on_click_callback() is triggered when the user clicks the "Ask" button. Here's a breakdown of what it does :
Loading Styles: It starts by loading the necessary styles for our application using
load_css().User Input Handling: The function retrieves the user's input (referred to as
customer_prompt) from the chat input field.Generating AI Responses: If the user has provided a prompt (i.e.,
customer_promptis not empty), the function generates an AI response using a language model (LLM). This generated response is stored inllm_response.Updating Chat History: Both the user's input and the AI's response are appended to the chat history stored in
st.session_state.history. This history likely helps us display the conversation to the user.def on_click_callback(): load_css() customer_prompt = st.session_state.customer_prompt if customer_prompt: st.session_state.input_value = "" st.session_state.initial_message_sent = True with st.spinner('Generating response...'): llm_response = st.session_state.chain( {"context": st.session_state.chain.memory.buffer, "question": customer_prompt}, return_only_outputs=True) st.session_state.history.append( Message("customer", customer_prompt) ) st.session_state.history.append( Message("AI", llm_response) )
The Main Function
def main():
initialize_session_state()
chat_placeholder = st.container()
prompt_placeholder = st.form("chat-form")
with chat_placeholder:
for chat in st.session_state.history:
if type(chat.Message) is dict:
msg = chat.Message['answer']
else:
msg = chat.Message
div = f"""
<div class = "chatRow
{'' if chat.origin == 'AI' else 'rowReverse'}">
<img class="chatIcon" src = "app/static/{'elsa.png' if chat.origin == 'AI' else 'admin.png'}" width=32 height=32>
<div class = "chatBubble {'adminBubble' if chat.origin == 'AI' else 'humanBubble'}">​ {msg}</div>
</div>"""
st.markdown(div, unsafe_allow_html=True)
with st.form(key="chat_form"):
cols = st.columns((6, 1))
# Display the initial message if it hasn't been sent yet
if not st.session_state.initial_message_sent:
cols[0].text_input(
"Chat",
placeholder="Hello, how can I assist you?",
label_visibility="collapsed",
key="customer_prompt",
)
else:
cols[0].text_input(
"Chat",
value=st.session_state.input_value,
label_visibility="collapsed",
key="customer_prompt",
)
cols[1].form_submit_button(
"Ask",
type="secondary",
on_click=on_click_callback,
)
# Update the session state variable when the input field changes
st.session_state.input_value = cols[0].text_input
Findings :
- Customize as per your wish
and don't forget to call the main function 😅
if __name__ == "__main__":
    main()
Deploy your streamlit
To deploy the streamlit app to streamlit cloud follow the documentation
To add custom theme to your streamlit app load, the theme into your
config.tomlfile. The theme which I used is provided below.[theme] base="light" primaryColor="purple"
Conclusion
And that's the process I followed to create the chatbot. If you have any questions or want to explore the code further, you can visit the
GitHub repository: hotel-booking-bot
Check the live deployment: sheraton-bot
It's important to note that my approach and findings are not set in stone. There might be errors or alternative methods that I'm not aware of at the moment. Please don't hesitate to reach out if you come across any such issues or have suggestions for improvement; I'll gladly address them
Aniz B N